Getting Started
Make sure to follow the initial barcode scanner setup before you pair it with your iPad so it's in iOS mode. Already paired? No worries, just follow these steps instead.
- 1
-
Add Associates
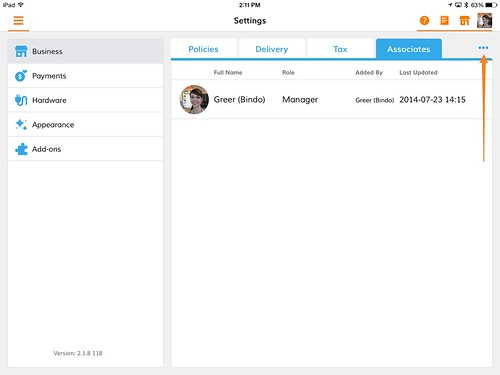
By now, you’ve created your store and a Bindo ID. Let's add your associates next.Tap on the sidebar menu → Settings → Associates tab.

Tap the more options icon (three blue dots, or a blue gear)
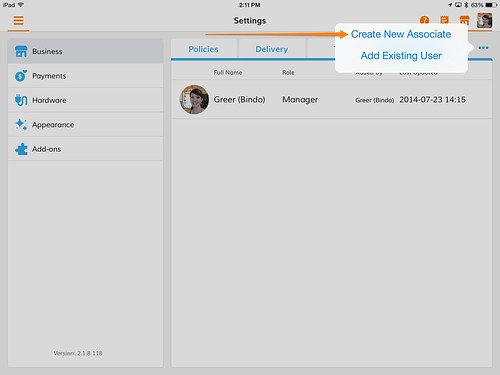
Tap Create New Associate.
Have your associate fill in the information, and choose their permission level.
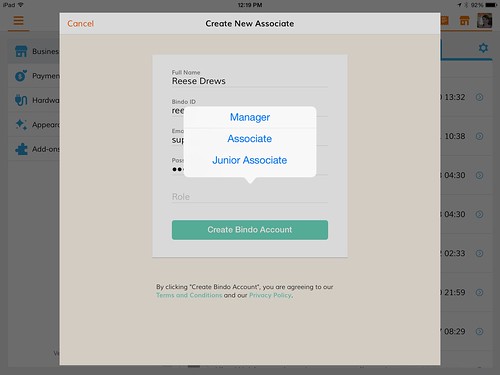
Tap Create Bindo Account.Your associate now has a Bindo ID, and is added to your store.
- 2
-
Add Inventory
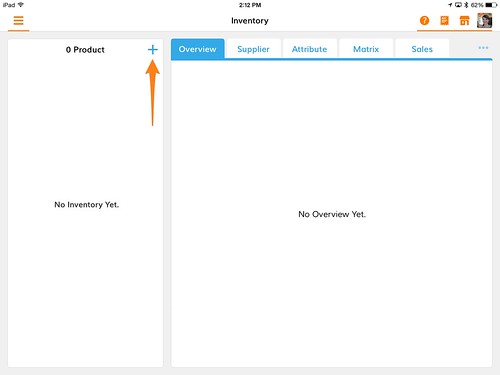
Open the sidebar menu → Inventory

Tap on the +
 Scan a UPC or enter it manually and tap Done.
Enter a price and tap Done.

Tap Save in the lower left corner. Your item is now saved to the inventory.
- 3
-
Add customers
Tap on Sidebar Menu → Customers
Tap on the +
Enter the customer information (only a name is required)
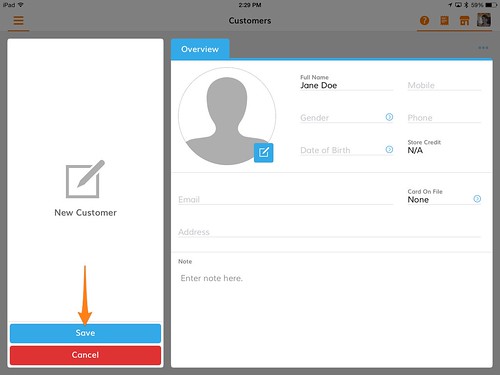
Tap Save
Your customer now has an account at your store.
- 4
-
Ring Up a Sale
Tap on Sidebar Menu → Register
Scan a product (enter a price if it’s a new item) to add it to the receipt, or tap on the inventory icon to search for a product, and tap to add the item to the receipt.
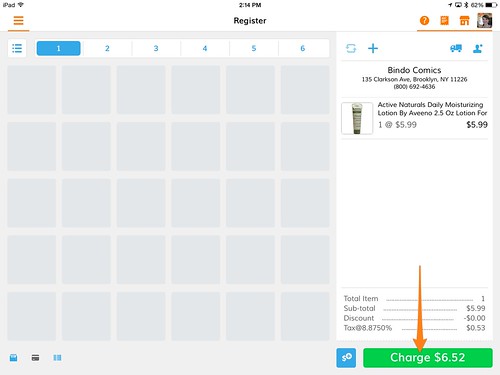
Tap the green Charge button in the bottom right corner to go to the payment screen
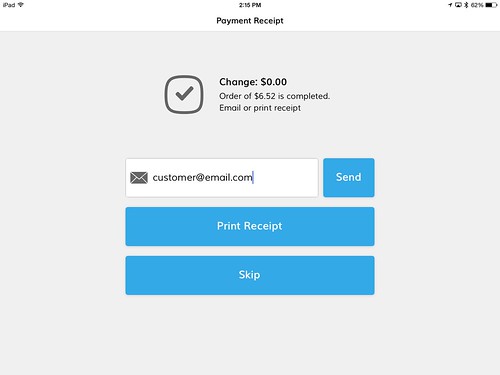
Tap the green Tender button to run a cash transaction

Enter an email and tap Send to send an email receipt. You can also tap Print Receipt, or tap Skip to skip printing a receipt.
- 5
-
Run a Sales Summary Report
Tap on Sidebar Menu → Reports

Tap on Sales Summary Report
Tap on the Date in the upper left-hand corner
Tap on a calendar date, or you can tap on one of the pre-selected ranges across the top.
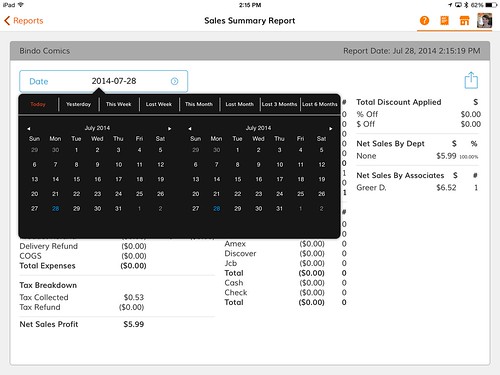
Your report for the selected date(s) appears. You can export (email it as a csv file) it by tapping on the blue box in the upper right-hand corner.


Want to learn more? You can find more in-depth information on the five steps in this guide by clicking on the links below!
1. Add Associates (and check out some other neat settings you can learn about in the Back Office).
2. Inventory
3. Customers
4. Register
5. Reports